Welcome to the Fender Telecaster Wiring Guide, your comprehensive resource for understanding and customizing the electronics of this iconic guitar. Designed for both professionals and hobbyists, this guide covers basic circuits, advanced modifications, and troubleshooting tips to help you achieve your desired tone. Whether you’re restoring a vintage model or experimenting with modern upgrades, this guide provides detailed insights and step-by-step instructions to enhance your Telecaster’s performance and sound quality.
1.1 Overview of the Telecaster’s Electronics
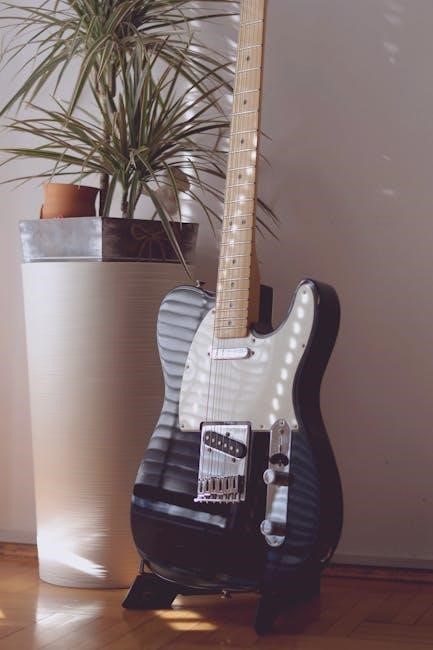
The Fender Telecaster’s electronics consist of two single-coil pickups, a 3-way pickup selector switch, one volume control, and one tone control. The circuit is simple yet effective, providing a wide range of tonal options. The electronics are routed through a control plate, making it accessible for modifications and upgrades to suit various playing styles.
1.2 Importance of Proper Wiring
Proper wiring is essential for ensuring optimal performance, tone, and reliability in your Telecaster. Incorrect wiring can lead to signal loss, hum, or malfunctioning controls, negatively impacting your playing experience. Accurate connections guarantee clear signal flow, allowing the guitar to deliver its signature twang and versatility, making it vital for both beginners and experienced players.
1.3 Tools and Materials Needed
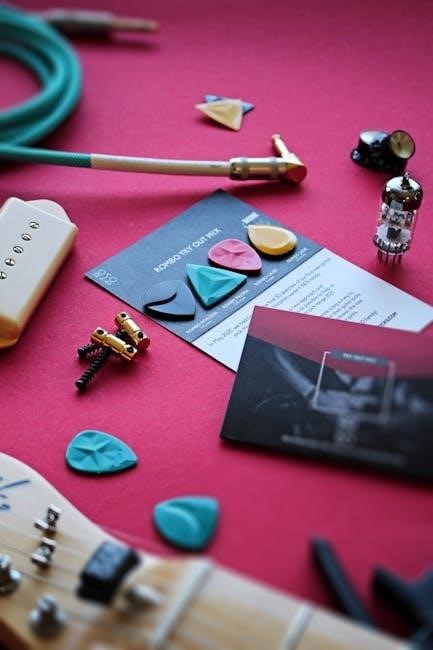
To properly wire your Telecaster, you’ll need essential tools like a soldering iron, wire cutters, and a screwdriver. Materials include high-quality capacitors, CTS pots, an Oak Grigsby switch, and vintage-style wire. Using the right components ensures reliable connections and optimal tone. Always organize your workspace and follow diagrams for accuracy and safety.
Standard Fender Telecaster Wiring Diagram
The standard Telecaster wiring diagram features a simple yet effective 3-way switch setup, volume, and tone controls, with a 0.047µF capacitor for tone shaping. This configuration ensures clear, crisp tones and reliable performance, making it a timeless choice for players seeking the classic Telecaster sound.
2.1 Understanding the 3-Way Switch Setup
The 3-way switch is central to the Telecaster’s electronics, allowing players to select between neck, bridge, or both pickups. Position 1 activates the bridge pickup, Position 2 combines both, and Position 3 engages the neck pickup. This setup provides distinct tonal options, from bright bridge tones to warm neck sounds, with the middle position offering a balanced blend. The switch is typically a CRL 3-way type, ensuring reliable pickup selection and durability.
2.2 Volume and Tone Controls Explained
The Telecaster features a single volume control and a tone control, both utilizing 250k potentiometers. The volume knob adjusts the overall output level, while the tone knob shapes the high-frequency response. A 0.047µF tone capacitor filters high frequencies as the tone pot is reduced, creating a warmer sound. This classic setup provides simplicity and versatility, allowing players to dial in their preferred tone without complexity. The controls are wired to ensure a balanced signal path, maintaining the guitar’s signature clarity and punch.
2.3 Grounding and Shielding Techniques
Proper grounding and shielding are essential for minimizing noise and hum in your Telecaster. Ground all metal components to a common point, ensuring a clean signal path. Use shielding materials in the electronics cavity to reduce electromagnetic interference. This setup ensures optimal tone clarity and prevents unwanted noise, maintaining a professional sound quality.

Modified and Upgraded Telecaster Wiring
Explore advanced Telecaster wiring modifications to expand tonal possibilities. Discover how to install 4-way switches, coil-splitting, and active electronics for enhanced versatility and unique sound shaping capabilities.
3.1 4-Way Switch Wiring for Expanded Tonal Options
Unlock new tonal possibilities with the 4-way switch wiring for your Telecaster. This modification allows for series, parallel, and out-of-phase configurations, delivering a richer and more diverse sound palette. Ideal for musicians seeking to expand their musical expression and versatility while maintaining the classic Telecaster feel and playability.
3.2 Adding a Tone Capacitor for Enhanced Sound
A tone capacitor refines your Telecaster’s high-frequency response, allowing precise tonal shaping. Install a high-quality capacitor like the Orange Drop to tame harsh highs or retain clarity. Choose the right value (0.047μF or 0.022μF) to match your pickups and playing style, ensuring a balanced and articulate sound across all settings.
3.3 Coil Splitting and Other Advanced Modifications
Coil splitting allows humbucker coils to function as single-coils, enhancing versatility. Use push-pull pots to engage this feature, delivering crisp, single-coil tones while retaining humbucker power. Explore additional mods like active circuits or custom switching to further expand your Telecaster’s tonal palette and unlock unique sonic possibilities for modern playing styles and genres.
Telecaster Wiring Diagrams and Schematics
This section provides a comprehensive collection of Telecaster wiring diagrams, including standard, Deluxe, Thinline, and custom setups. Explore detailed schematics in PDF format for your project needs.
4.1 Standard Telecaster Wiring Schematic
The standard Telecaster wiring schematic features a straightforward layout with two pickups, a 3-way switch, and volume and tone controls. This classic configuration provides a clean, versatile tone, ideal for various genres. The circuit includes a tone capacitor for high-frequency roll-off and proper grounding for reduced noise. Perfect for maintaining the iconic Telecaster sound.
4.2 Deluxe and Thinline Telecaster Variations
The Deluxe and Thinline Telecasters feature unique wiring setups, often including humbuckers or additional tone-shaping components. These models offer expanded tonal versatility compared to the standard Telecaster, with configurations like dual volume and tone controls or special switching options. Their wiring diagrams reflect these enhancements, providing players with a broader range of sonic possibilities while maintaining the Telecaster’s signature clarity.
4.3 Custom Wiring Diagrams for Unique Setups
Custom wiring diagrams allow players to experiment beyond standard Telecaster configurations. From push-pull pots enabling coil-splitting to 4-way switches for series/parallel tones, these diagrams cater to players seeking unique sonic possibilities. They often incorporate additional pickups, active electronics, or alternative switching systems, offering unparalleled versatility for those looking to push the boundaries of traditional Telecaster sound.
Step-by-Step Guide to Wiring a Telecaster
Master the process of wiring your Telecaster with a detailed, step-by-step guide. From preparing components to final testing, this section ensures a smooth and successful installation of your guitar’s electronics.
5;1 Preparing the Guitar and Components
Start by gathering essential tools like a soldering iron, wire strippers, and screwdrivers. Inspect and prepare all components, ensuring pickups, pots, and capacitors are compatible. Carefully disassemble the guitar, labeling wires for clarity. Organize parts in a clean, static-free workspace to avoid damage and ensure a smooth wiring process.
5.2 Installing Pickups and Electronics
Begin by soldering the pickups to the switch and pots, ensuring proper wire connections. Carefully route and secure the wires within the guitar body. Install the pickups in their respective cavities, aligning them precisely. Connect the output jack and ground wires, verifying all connections for continuity and proper function before final assembly.
5.3 Final Testing and Adjustment
Once all components are installed, test the guitar thoroughly. Check each pickup’s operation, ensuring smooth volume and tone control functionality. Verify that the 3-way switch cycles through pickups correctly. Use a tuner or amplifier to confirm sound quality. Adjust pickup heights and inspect solder joints for any issues. Fine-tune as needed for optimal performance.
Advanced Telecaster Wiring Techniques
Discover advanced wiring methods like active electronics, preamps, and push-pull pots to enhance tonal versatility. These techniques cater to experienced players seeking unique and customizable sounds.
6.1 Active Electronics and Preamps
Active electronics and preamps enhance the Telecaster’s tonal capabilities by introducing powered circuits. These systems often include active pickups or preamp stages, providing boosted output and expanded EQ options. Unlike passive setups, active electronics require a power source, typically a battery, to operate. This configuration is ideal for players seeking modern, versatile tones with precise control over their sound. Components like active humbuckers or onboard preamps can significantly alter the guitar’s voice, offering clarity and sustain. However, they also add complexity to the wiring and maintenance. For those pursuing a contemporary sound, active electronics offer unparalleled flexibility and performance.
6.2 Using Push-Pull Pots for Added Versatility
Push-pull pots offer a convenient way to add functionality without cluttering the control layout. By integrating switches into volume or tone pots, players can access coil-splitting, phase switching, or active circuits seamlessly. This modification maintains the Telecaster’s classic aesthetic while expanding its tonal palette, making it ideal for versatile guitarists seeking enhanced capabilities without compromise. The compact design ensures a clean look, preserving the simplicity of the Telecaster’s original design. This feature-rich solution is perfect for modern players who demand flexibility without sacrificing the guitar’s timeless appeal. The push-pull pots are a practical upgrade for those looking to explore new sonic territories easily.
6;3 Incorporating Alternative Switching Options
Exploring alternative switching options enhances the Telecaster’s versatility. A 4-way switch allows series/parallel pickup combinations, while a 5-way super switch offers five distinct tones. Blade or toggle switches can add coil-splitting or phase inversion. These modifications expand tonal possibilities, enabling players to access unique sounds without altering the guitar’s classic design. Custom switches provide flexibility for experimental setups.
Common Telecaster Wiring Issues and Solutions
Grounding problems, volume drops, and pickup malfunctions are typical wiring issues. Proper diagnosis and repair techniques ensure optimal performance. Solutions often involve checking connections, replacing faulty components, and ensuring proper shielding to eliminate noise and hum, restoring the guitar’s intended tone and functionality effectively.
7.1 Troubleshooting Grounding Problems
Grounding issues often cause unwanted hum or noise. Check all wire connections to ensure they are secure and free from corrosion. Verify that the bridge, pickups, and electronics are properly grounded to the guitar’s metal components. Inspect the output jack’s ground wire connection and ensure the shielding is intact to eliminate interference effectively.
7.2 Fixing Volume and Tone Control Anomalies
Volume and tone anomalies, such as intermittent sound or loss of signal, often result from faulty potentiometers or poor connections. Clean the volume and tone pots with contact cleaner to remove dirt and corrosion. Check for worn-out components and replace them if necessary. Ensure all solder joints are secure to restore proper functionality.
7.3 Diagnosing Pickup and Switch Malfunctions
Identify pickup issues by checking for intermittent signals or hum. Use a multimeter to test pickup coil resistance and continuity. For switches, ensure all contacts are clean and functioning. Inspect wiring for loose connections or breaks. Verify proper grounding and polarity to isolate faults. Consult wiring diagrams to confirm correct signal paths and connections.

The Role of Capacitors in Telecaster Wiring
Capacitors play a crucial role in shaping the Telecaster’s tone by filtering high frequencies and allowing low frequencies to pass through, enabling precise control over the guitar’s sound characteristics.
8.1 Understanding Tone Capacitors
Tone capacitors are essential components in the Telecaster’s wiring, responsible for filtering high frequencies and allowing low frequencies to pass through. Typically ranging from 0.001µF to 0.047µF, they are wired in series with the tone control, enabling precise adjustment of the guitar’s treble response. The Orange Drop capacitor, paired with a 500k resistor, is a popular choice for achieving a balanced, vintage tone.
8.2 Choosing the Right Capacitor Value
Selecting the correct capacitor value is crucial for achieving your desired tone. Common values range from 0.001µF to 0.047µF, with smaller values preserving more high-end clarity and larger values offering warmer, darker tones. A 0.022µF or 0.033µF capacitor is often recommended for a balanced sound, while a 0.047µF capacitor delivers a richer, vintage quality.
8.3 Installing and Testing Capacitors
When installing capacitors, solder the chosen value between the tone potentiometer’s input lug and ground. Use high-quality components like Orange Drop or Vintage Tone capacitors for optimal sound. After installation, test the tone control by rolling it off and on to ensure smooth operation and desired tonal reduction without hum or noise issues.
Custom Telecaster Wiring Ideas
Explore unique tone circuits, experimental configurations, and modern component integrations to craft a personalized sound. Discover how custom wiring can transform your Telecaster’s sonic capabilities and versatility.
9.1 Creating a Unique Tone Circuit
Designing a custom tone circuit allows you to tailor your Telecaster’s sound to your musical style. Experiment with alternative capacitor values, coil-splitting configurations, and advanced switching options to unlock new tonal possibilities. By blending traditional components with modern innovations, you can create a circuit that stands out while maintaining the Telecaster’s signature clarity and punch.
9.2 Experimental Wiring Configurations
Exploring unconventional wiring setups can unlock unique tonal possibilities for your Telecaster; Consider non-traditional coil configurations, series/parallel switching, or even active electronics for expanded versatility. These experimental approaches allow you to craft a sound that diverges from the standard Telecaster tone while maintaining its inherent character and playability.
9.3 Innovating with Modern Components
Incorporating modern components can elevate your Telecaster’s tone and functionality. Active electronics, preamps, and advanced switching systems offer enhanced versatility. High-quality pots, capacitors, and wiring kits ensure optimal performance. Experiment with modern materials and designs to create a unique sound while maintaining the Telecaster’s classic appeal.
This guide has provided a comprehensive overview of Fender Telecaster wiring, emphasizing the importance of understanding electronics for optimal tone and functionality. Encourage experimentation with modern components or classic setups to tailor your sound. Remember, the Telecaster’s versatility is limitless, and so is your creativity. Happy building and playing!
10.1 Summary of Key Wiring Concepts
Understanding the Telecaster’s wiring schematic is essential for achieving optimal tone and functionality. Proper grounding and shielding reduce noise, while the 3-way switch setup simplifies pickup selection. Tone capacitors shape high frequencies, and precise wire connections ensure reliability. These concepts form the foundation for both standard and custom wiring configurations, empowering players to refine their sound effectively.
10.2 Encouragement for Further Exploration
With a solid understanding of Telecaster wiring, feel inspired to experiment and innovate. Explore custom configurations, upgraded components, and unique tonal options. Join online communities, share ideas, and embrace the endless possibilities of modifying your guitar. Your Telecaster is a canvas—shape its sound to reflect your musical vision and creativity.
Resources and Further Reading
Explore recommended wiring diagrams, suppliers, and online forums for further learning. Check out Fralin Pickups, Etui London, and Six String Supplies for detailed guides and materials. Join enthusiast communities to share ideas and discover custom setups for your Telecaster.
11.1 Recommended Wiring Diagrams and Guides
For accurate and reliable information, explore resources like Fralin Pickups and Six String Supplies. Their detailed wiring diagrams and guides cover standard setups, like the 3-way switch, and advanced mods. Etui London and AxeKool Guitars also offer comprehensive manuals and step-by-step instructions. These sources ensure you can confidently customize your Telecaster’s electronics.
11.2 Suggested Tools and Materials Suppliers
For high-quality components, consider suppliers like CTS for pots, Orange Drop for capacitors, and Toneshaper Wiring Kits. Fralin Pickups and Etui London also offer excellent materials. These suppliers provide reliable parts for both standard and custom Telecaster wiring projects, ensuring durability and optimal tone.
11.3 Online Communities for Telecaster Enthusiasts
Join online forums like TDPRI and Reddit’s r/Telecaster to connect with fellow enthusiasts. These communities offer valuable insights, troubleshooting tips, and inspiration for custom mods. Share your projects, learn from experts, and discover unique wiring ideas to enhance your Telecaster’s sound and functionality.